
If your property uses purchase order (PO) numbers, you can add those PO#s to an order in RE-OPS. PO#s can be managed on the Web or in the RE-OPS Marketplace mobile app (both are reviewed in this guide).
1. Navigate to Order
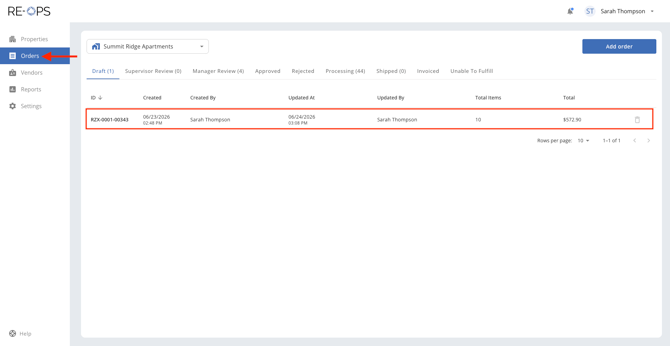
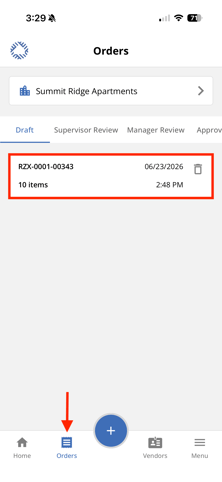
Sign into RE-OPS, navigate to the Orders section, and then select the order you would like to manage.
2. Find the Order Summary
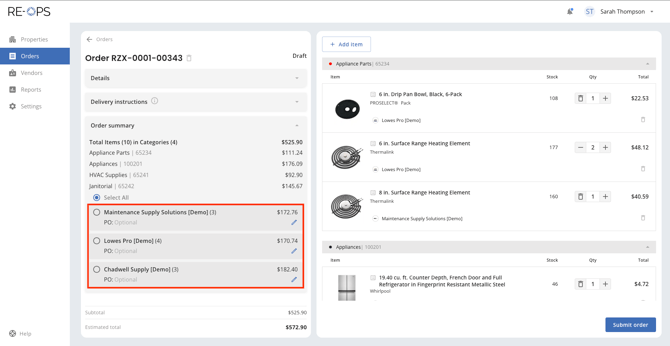
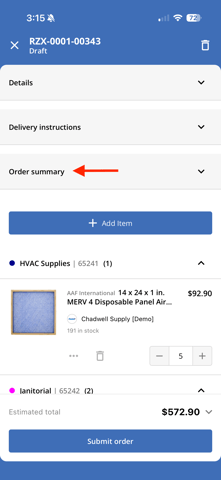
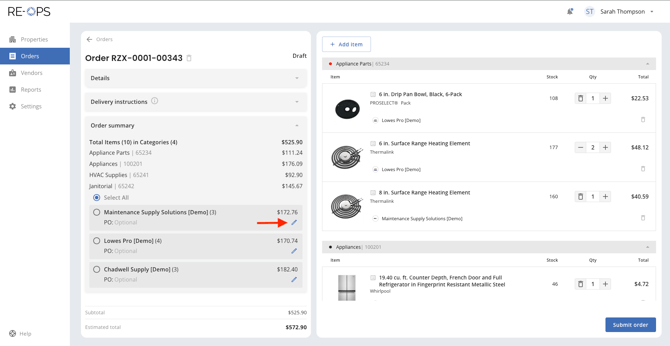
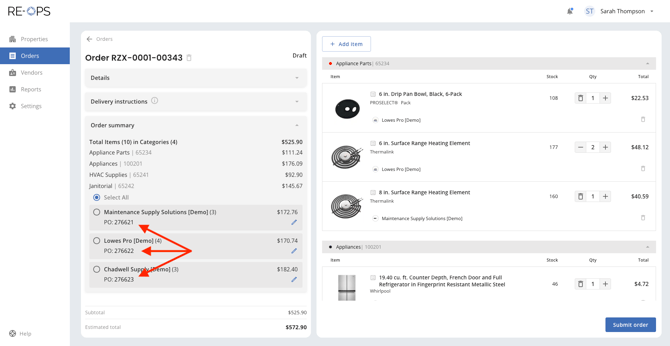
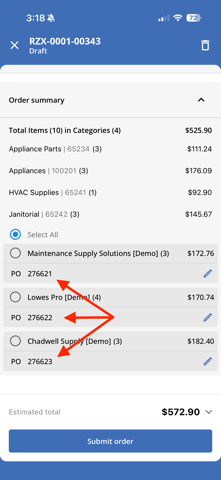
Locate the Order Summary section of the order. Here, the order total is broken down by supplier.
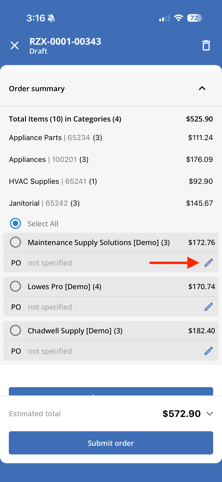
Note: In the mobile app, you'll find the Order Summary section above the 'Add Item' button.
3. Edit mode
To add a PO#, click the pencil icon to enter edit mode.
4. Add PO#
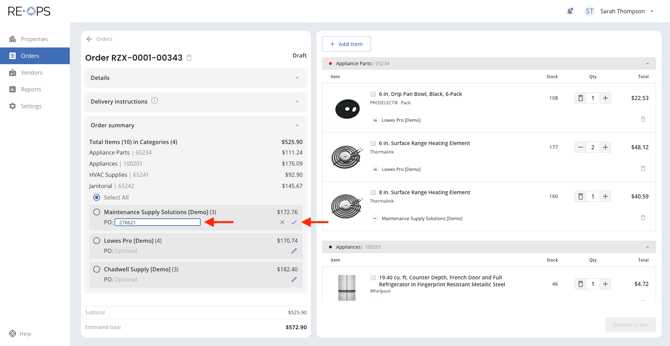
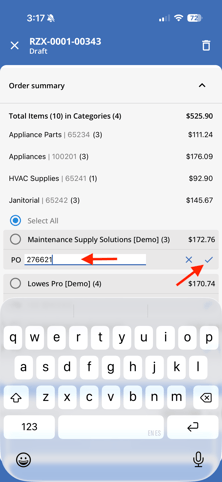
Once in edit mode, add the PO# and click the checkmark to save.
If you do not click the checkmark, the PO# will not be saved.
5. Confirm PO#s
Once a PO# has been assigned to each supplier, the order is ready to submit.
NOTE:
- PO#s will be provided to each supplier when the order is submitted. Properties should expect those PO#s to be reflected on the invoices they receive from suppliers.
- PO#s are optional in RE-OPS. If your property does not utilize PO#s, then a PO# is not needed.
Thanks for reviewing this guide! Should you have additional questions, please reach out to our team at help@re-ops.co. We're here to help!