1- Access Property Catalog 
2- Access Inventory Tab

3- Add Item to Inventory
Once in the inventory tab, for this particular exercise we will go through adding an item to the inventory list, and organize the item according to the Inventory available in the maintenance shop.

4- Select an item from property catalog
5- Add Item to Inventory
RE-OPS users have the ability to simply add the item to the inventory list, or add the item and also adjust the positioning of the item selected in the inventory list by choosing to add the item and adjust the flow. 

6- Adjust Flow of inventory
Once an Item is added successfully to the inventory catalog, users can drag an drop the item to match their maintenance shop organizational scheme which would make ordering items for inventory replenishment more streamlined through the RE-OPS mobile app. 
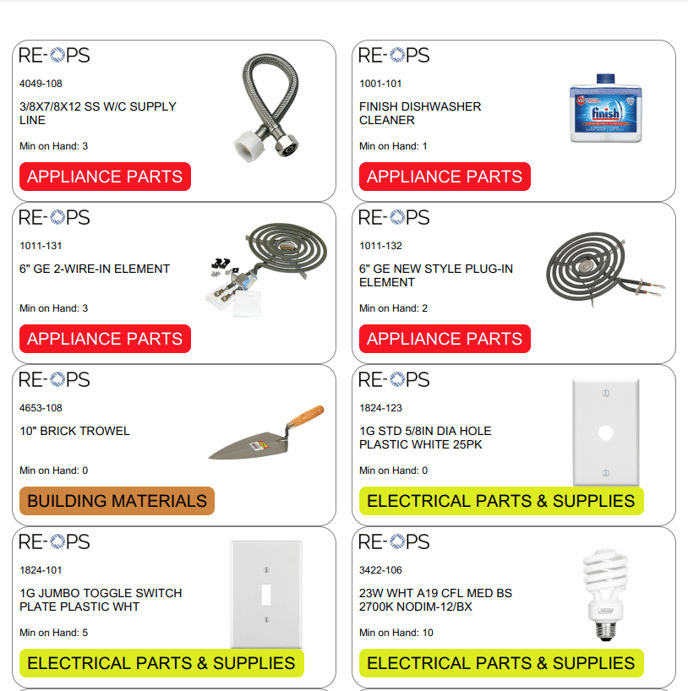
7- Get Labels
Get labels is a feature that allows users to print product labels directly from their inventory list, such labels can be directly attached to Inventory bins on a maintenance shop for easier ID of items, SKUS, Units of Measure, and available product. 
Upon downloading the labels, a PDF document with all items in the inventory catalog will br saved to the user's computer. This feature is only available on RE-OPS web app.
Should you have additional questions, please reach out to our Help Team at help@re-ops.co. We're here to help!